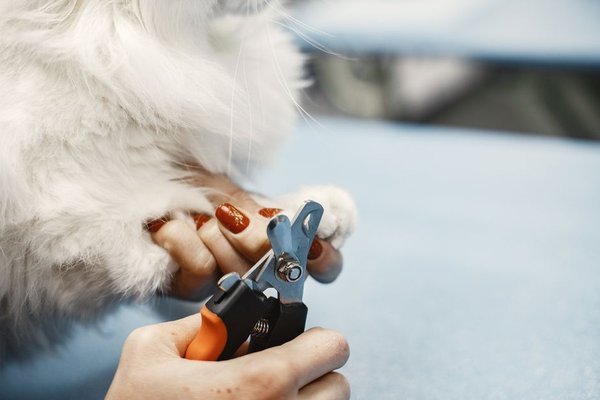
Trimming your dog’s nails at home can feel intimidating, especially if you have ever worried about cutting too far or making your dog nervous. The good news is that nail care becomes much easier once you understand the basic technique, use the right tools, and work at your dog’s pace. This DIY dog nail trimming guide walks you through the process from preparation to aftercare, so you can keep your dog comfortable while reducing the need for frequent grooming appointments.
Why Regular Nail Trimming Matters
Overgrown nails are more than a cosmetic issue. When a dog’s nails become too long, they can change the way the paws meet the ground. This may affect posture, create pressure on the toes, and make walking on hard surfaces uncomfortable. Long nails are also more likely to split, snag, or break.
Regular trimming supports overall dog paw care by keeping the feet balanced and reducing unnecessary strain. A simple way to judge nail length is to listen as your dog walks across a hard floor. If you hear loud clicking with every step, the nails may be ready for a trim.
What You Need Before You Start
Gather everything before bringing your dog into position. You will need suitable dog nail clippers, a bright light, a few small treats, and styptic powder or another pet-safe product designed to stop minor nail bleeding. A nail file or grinder can also help smooth rough edges after clipping.
Choose clippers that feel comfortable in your hand and are appropriate for your dog’s nail size. Scissor-style clippers often provide good control for medium and large dogs, while smaller clippers may be easier for toy breeds. The blades should be sharp. Dull clippers can crush or splinter the nail instead of making a clean cut.
Create a Calm Setting
Pick a quiet, well-lit area where your dog feels secure. Avoid starting immediately after exciting play or when your dog is already restless. A relaxed dog is easier to handle, so consider trimming after a walk or during a naturally sleepy part of the day.
If your dog is new to nail care, spend a few days practising without clipping. Touch the paws, gently hold each toe, show the clippers, and reward calm behaviour. This helps your dog learn that paw handling is safe and predictable.
Understanding the Quick
The quick is the sensitive living tissue inside the nail that contains blood vessels and nerves. Cutting into it can cause pain and bleeding. On pale nails, the quick often appears as a pink area inside the translucent nail. Stop trimming before reaching it.
Dark nails require more caution because the quick is harder to see. Instead of trying to remove a large section at once, take very small slices. As you trim, check the cut surface of the nail. A pale, dry centre is generally safer, while a darker central spot can indicate that you are getting close to the quick.
Many owners search for advice about quick cutting dogs because they are afraid one mistake will make future grooming impossible. A small accidental nick can happen, even with care. Staying calm, stopping the bleeding promptly, and ending the session positively can prevent the experience from becoming more stressful than necessary.
Step-by-Step DIY Dog Nail Trimming Guide
Step 1: Position Your Dog Comfortably
Small dogs may sit on your lap or on a stable surface with a non-slip mat. Larger dogs can stand, sit, or lie on their side. Choose the position that gives you control without forcing the leg into an unnatural angle.
Hold the paw firmly but gently. Support the toe you are trimming and keep loose fur away from the clippers. If your dog pulls away, pause rather than tightening your grip aggressively.
Step 2: Identify the Safe Cutting Area
Look at the curve of the nail and locate the sharp hooked tip. Your first goal is to remove only this end section. On light nails, use the visible quick as your guide. On dark nails, plan several tiny cuts rather than one deep cut.
Step 3: Trim at a Controlled Angle
Place the dog nail clippers around the tip and make a quick, confident cut. Avoid twisting the clippers or squeezing slowly, as this can make the nail feel pinched. Follow the natural angle of the nail rather than cutting straight across too close to the toe.
After each cut, inspect the nail before continuing. It is better to leave the nail slightly longer than to risk cutting the quick. With regular maintenance, you can gradually shorten long nails over time.
Step 4: Reward After Each Paw
Offer praise and a small treat after one or two nails, especially during early sessions. Some dogs can comfortably complete all four paws at once, while others do better with one paw per day. There is no rule that says the entire job must be finished in a single sitting.
Step 5: Smooth Rough Edges
Use a file or grinder to remove sharp corners if needed. If using a grinder, introduce the sound and vibration gradually. Keep the tool moving and avoid holding it against one nail for too long, as friction can create heat.
What to Do If You Cut the Quick
If the nail begins to bleed, remain calm and apply styptic powder directly to the tip. Use gentle pressure for a short period and keep your dog still while the bleeding slows. A minor quick cut usually looks more dramatic than it is because nails can bleed noticeably.
Contact a veterinarian if bleeding does not stop, the nail is badly torn, your dog appears to be in significant pain, or you are unsure how serious the injury is. Do not continue trimming the remaining nails during the same session if your dog has become frightened.
How Often Should You Trim Your Dog’s Nails?
Many dogs need nail trimming every three to four weeks, but the right schedule varies. Dogs that walk frequently on pavement may naturally wear their nails down, while dogs that spend more time indoors or on soft ground may need more frequent attention.
Check the nails weekly rather than relying only on a calendar. Dewclaws deserve special attention because they may not touch the ground and can become overgrown quickly. Consistent dog paw care also includes checking between the toes for redness, debris, cracked pads, or anything unusual.
How to Make Future Trims Easier
Short, positive sessions are usually more effective than forcing a nervous dog through a long appointment. Handle the paws regularly, reward cooperation, and keep the clippers visible during calm moments. You can also trim one nail, offer a treat, and stop. Repeating this routine builds trust.
If your dog growls, snaps, panics, or cannot be safely restrained, seek help from a veterinarian or experienced groomer. Some dogs have pain, previous negative experiences, or strong handling sensitivities that require a slower behaviour plan.
Frequently Asked Questions
Can I use human nail clippers on my dog?
Human clippers may work for very small puppy nails, but proper dog nail clippers are usually safer and provide better control as the nails become thicker.
How short should dog nails be?
The ideal length allows the dog to stand and walk comfortably without the nails pressing heavily against the floor. Always leave space before the quick rather than aiming for an extremely short cut.
Why does my dog hate having its nails trimmed?
Your dog may dislike paw handling, the pressure of dull clippers, the sound of tools, or memories of a painful trim. Gradual desensitisation, treats, and shorter sessions can help.
Can long nails be shortened in one session?
It is safer to shorten severely overgrown nails gradually. The quick may extend farther down a long nail, so small regular trims give it time to recede.
Final Thoughts
At-home nail trimming does not need to be a battle. The safest approach is to prepare carefully, make small cuts, watch for signs that you are near the quick, and respect your dog’s comfort level. With patience and regular practice, this DIY dog nail trimming guide can become part of a simple grooming routine that protects your dog’s paws, improves comfort, and saves unnecessary trips to the groomer.